Jobs
Creating and managing wipe jobs, viewing and editing job details, and exporting job information.
The Jobs tab is the central workspace for managing and reviewing all sanitization sessions in Clear. Each wipe session is organized as a Job, so operators can monitor, control, and audit batch processing activities.
Within Jobs, operators can:
- Track batch-level progress across multiple devices wiped in parallel.
- Manage job states during execution (edit, terminate, or close jobs).
- View job-level results and monitor overall progress.
- Export consolidated reports and certificates upon completion.
- Maintain a complete, auditable history of all sanitization activities.
Creating a wipe job
A wipe job is created when one or more devices are selected and a wipe operation is initiated.
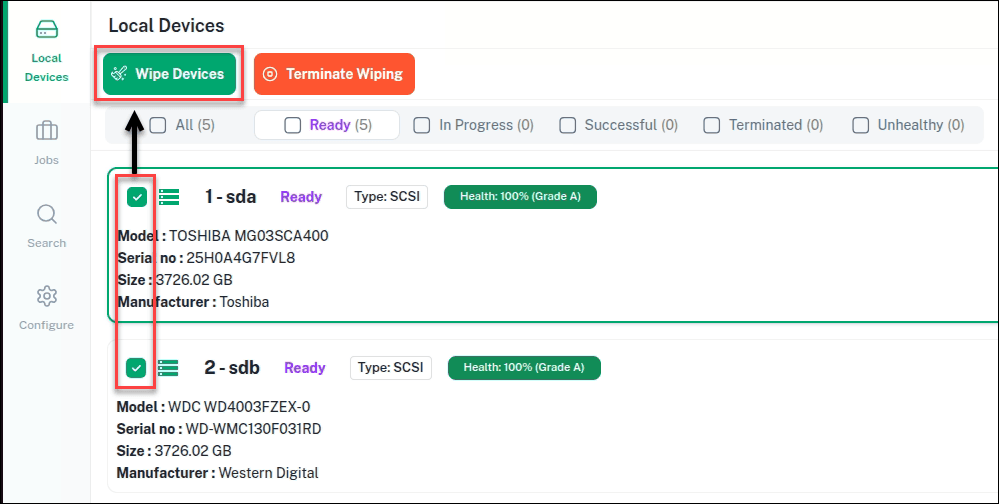
In the Local Devices tab, select one or more devices marked Ready. Review device information and status before adding a device to the list.
Confirm any locked devices have been configured and unlocked first (see Per Device Configuration).
Important
Wiping is irreversible once initiated and permanently removes all data from the selected devices. Ensure the correct devices are selected and any required data has been backed up before proceeding.
Click Wipe Devices from the top bar. The Select Job Confirmation dialog opens.
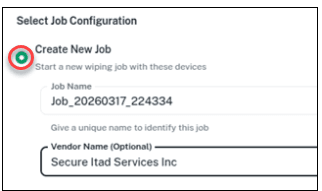
Choose Create New Job to start a new job and specify a Job name (required) and Vendor (optional):
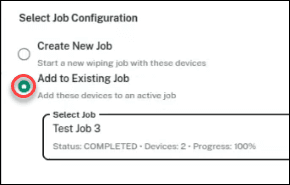
Or choose Add to Existing Job and select an existing job to add the devices to:
Click Yes, Wipe Devices to start. The selected devices are grouped into a single job and move to the Jobs tab for monitoring.
Managing jobs
The Jobs tab gives visibility into active and completed jobs, so you can monitor progress, manage states, and access results. Devices from a vendor can be grouped into one job so reports and certificates for the whole batch can be generated together, then the job closed once all devices finish.
Click the Jobs tab in the navigation panel to access this workspace.
Viewing job details
Click on the required job from the list. The Job Details view opens, showing all devices assigned to the job.
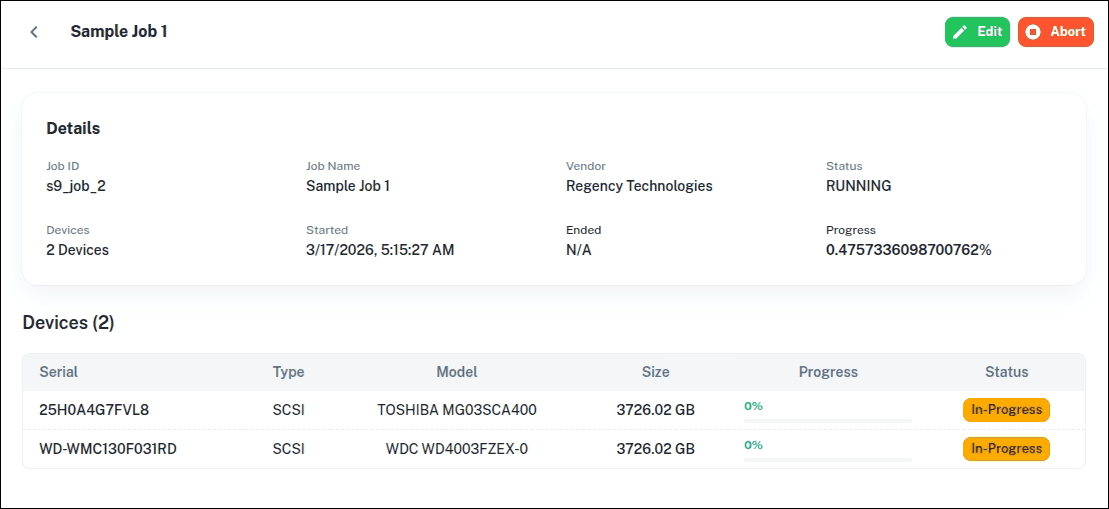
From here you can review and edit job details, verify included devices, review device-level status, abort the job, or export job data for closed/completed jobs.
Edit job information
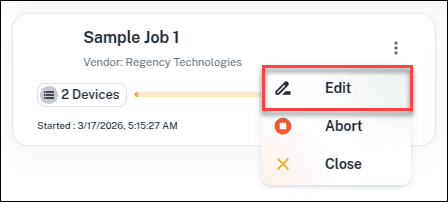
Locate the job, click the three dots in the top right, and select Edit.
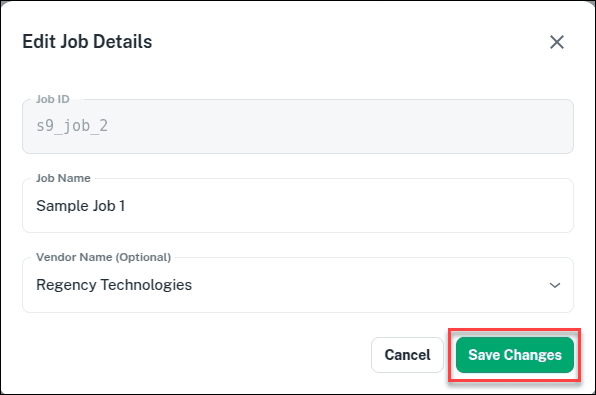
The Edit Job Details dialog opens.
Abort job
Abort a job to stop all ongoing sanitization processes — for example, if the wrong devices were selected, or an operational issue requires immediate termination.
Note that...
- Only available when the job is Running.
- Aborting terminates all in-progress device operations.
- Device status and its sanitization certificate will be terminated.
- The job status updates to Aborted.
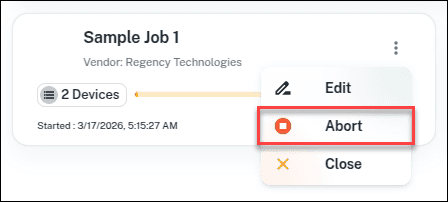
Locate the job, click the three dots, then click Abort.
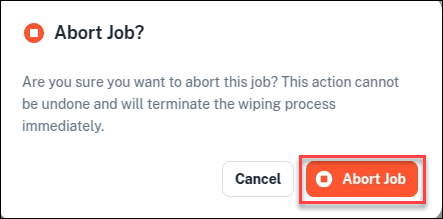
A warning displays.
Close job
Close a job to finalize it once all sanitization activities are complete and verified. This signals processing is done and no further changes are expected.
Note that...
- Closing a job moves it to the Closed category.
- No additional devices can be added once closed.
- The job can no longer be edited.
- It remains available for reporting, certificate generation, and audit review.
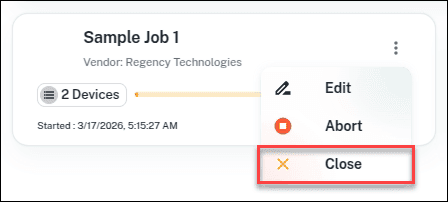
Locate the job, click the three dots, then select Close.
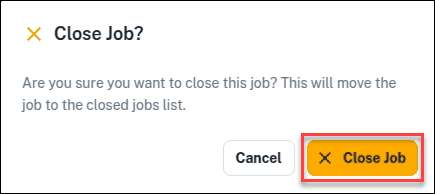
A warning displays.
Viewing jobs
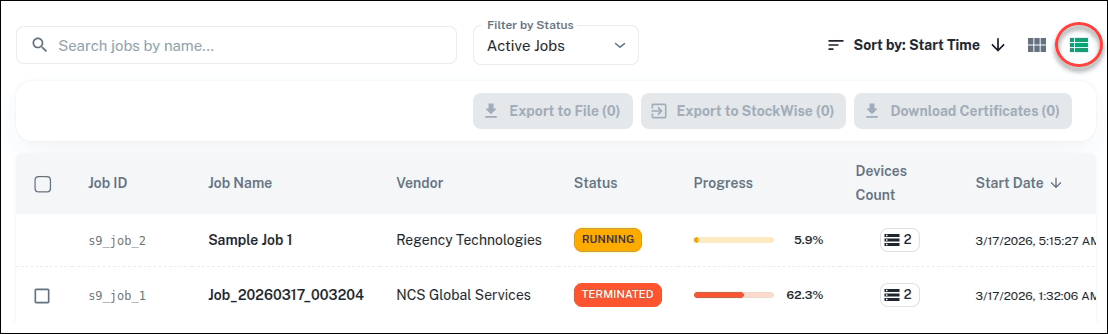
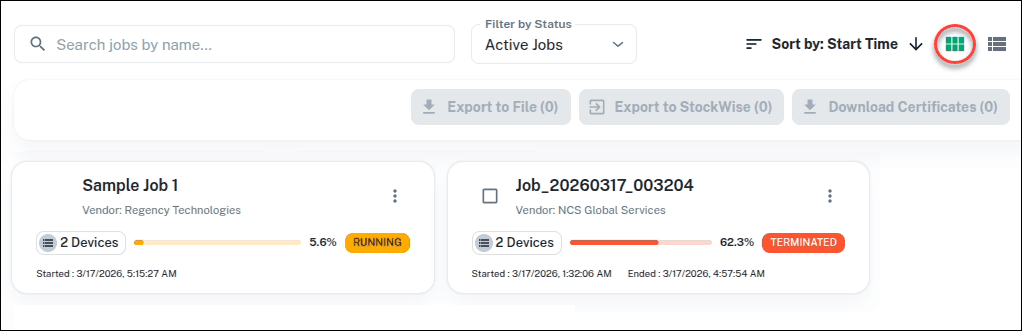
For each job, Clear displays: Job ID, Job Name, Vendor, Status, Progress, Devices count, and Start date. Jobs can be viewed in two layouts:
A structured, tabular layout, ideal for managing large volumes of jobs.
A visual, card-based format, suited to smaller datasets and quick review.
Filter jobs by status
Use the Filter by Status drop-down in the top-right corner of the Jobs workspace.
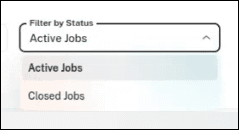
Active Jobs — currently open and manageable. A job in this state can be:
- Running — one or more devices currently being wiped.
- Completed — all devices finished, but the job stays open for review, reporting, or export.
- Aborted — stopped by the user; in-progress operations terminated.
Active jobs are editable and can transition to Closed once processing and verification are complete.
Closed Jobs — finalized and read-only; retained for reporting, certificate generation, and audit purposes.
Job search
Type a keyword in the search bar at the top left of the application to quickly locate jobs. The workspace updates dynamically.
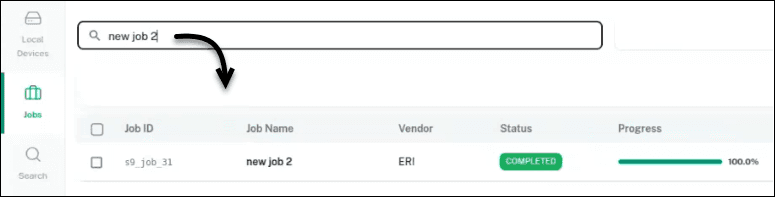
Exporting job information
Export actions are available only when jobs are Completed or Aborted.
Export to file (CSV)
Exports job and device data as a CSV file. Selecting multiple jobs generates one consolidated file.
By default, all available columns are included. Customize which columns export in Export Configuration.
Select the required job(s) and click Export to File.
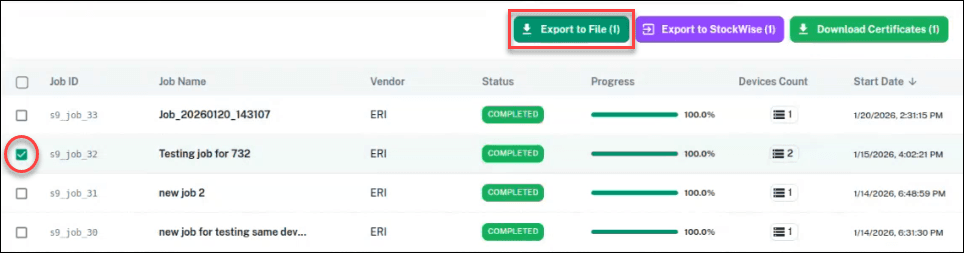
Save the file to your desired location.
Download certificates
For Completed or Aborted jobs, download certificates and reports as a compressed ZIP archive.
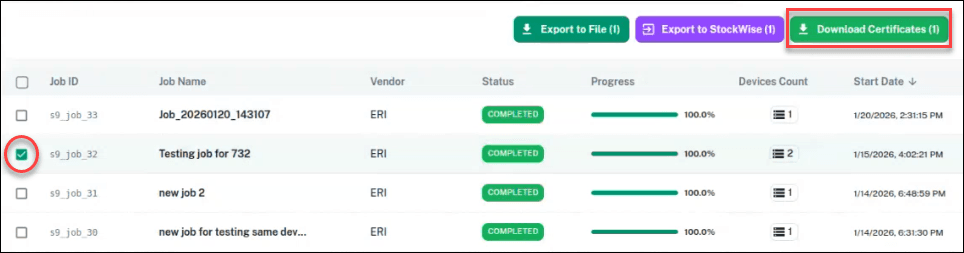
Select the required job(s), click Download Certificates, and save to your desired location.
Export to StockWise
Export jobs directly to StockWise. Select the required jobs and click Export to StockWise. Devices that pass sanitization can be exported as resale-ready inventory, along with their reporting data. See Export to StockWise to set up the integration first.